
Reselling cPanel shared hosting can be tricky from a security point of view because many customers lack solid technical skills, so the server administrator must implement strict security policies.
WHM makes this an easy task by providing a number of very useful tools that tackle some of the most common issues in a shared environment; we will review them in this article.
The Security Advisor
This is probably the most useful security tool in WHM because it analyzes the current settings and provides a list of potential vulnerabilities and how to tackle them.
The interface can be accessed by navigating to Home > Security Center > Security Advisor, the scan starts immediately.
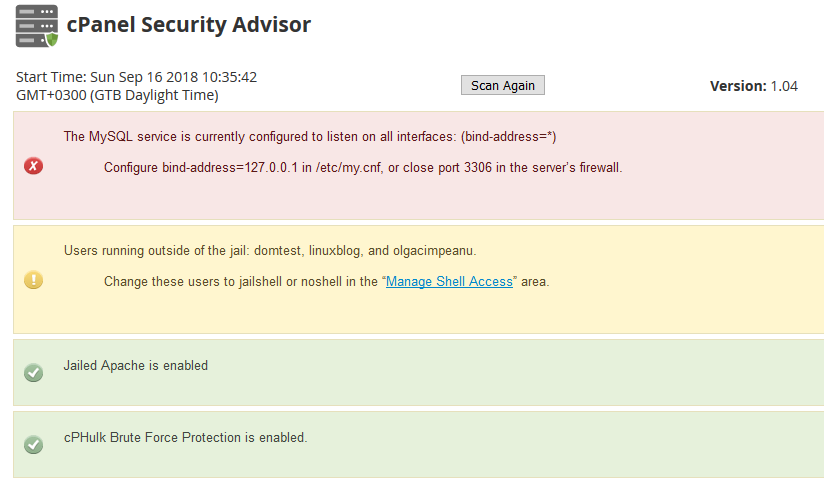
The issues found are listed based on their importance and grouped by color, with the most serious ones displayed in red on top, followed by potential problems in yellow and correct settings in green.
Follow the provided advice and fix the security vulnerabilities identified, some of them require services to be restarted so you might have to notify your customers about the maintenance.
Re-scan your server after making the changes, to make sure that no more issues are reported.
Secure SSH
As a general rule, you shouldn’t give SSH access to users on a shared server unless it is really needed.
If some customers require access, the first thing to do is to change the default SSH port, we have already described the procedure in another article.
The jailed shell environment is another security feature provided by cPanel that restricts the access of shell users to their own home directory. The data of other users and the system files can’t be opened, so the damage is limited even if an account is hacked.
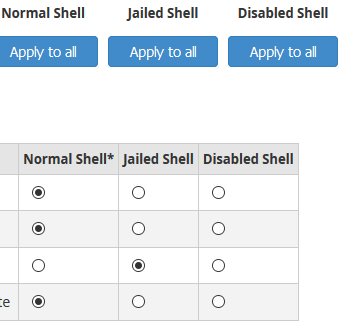
This secure type of shell can be activated from Home > Account Functions > Manage Shell Access. You can configure jailed shells for specific users, but the best option is to click on the Apply to all button on top to secure all SSH accounts. Never grant root access or sudo privileges to shared server users.
Prevent email abuse
Email spam is one of the most common problems in shared hosting environments, since a long message queue impacts all accounts. If a shared IP address is used, it can end up being blacklisted by a single mailbox that sends spam.
Make sure the email server is configured properly, restricting outbound SMTP connections and preventing the user “nobody” from sending mail. It is also possible to limit the maximum number of emails that an account can send per hour.
The latest version (74) of WHM has introduced an automatic protection mechanism that can be triggered when a potential spammer is detected.

You can configure it from the Mail tab in the Home > Server Configuration > Tweak Settings menu, it is based on the number of unique recipients per hour and the messages can be held or rejected.
Enable two-factor authentication
Two-factor authentication is an enhanced security feature that requires a code generated by an external app for cPanel logins, besides the usual password.

Navigate to Home > Security Center > Two-Factor Authentication in order to enable the policy for all accounts.
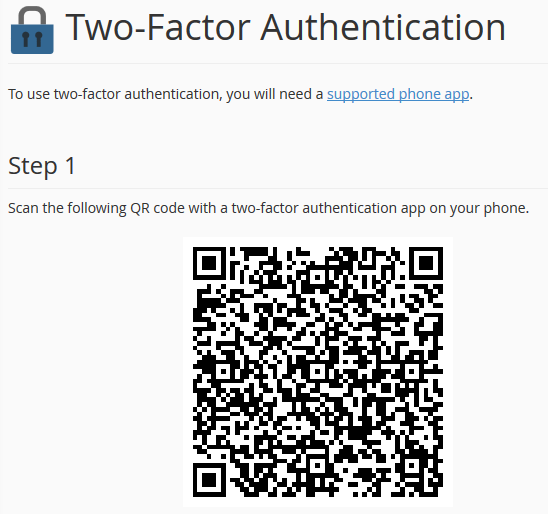
cPanel users can now configure access from the security tab, the supported mobile phone apps are Google Authenticator and Duo Mobile. Users have to scan the QR code on the screen in order to setup the app.
Install an antivirus and a firewall
Setting up a firewall is a mandatory security step for any server, we have already described how to install and configure CSF in this article.
The ClamAV antivirus is available as a plugin and can be installed with a single click from Home > cPanel > Manage Plugins.
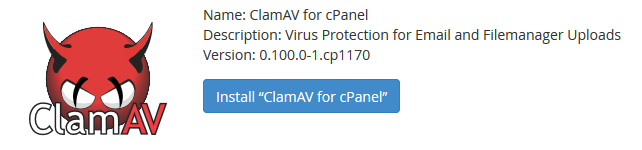
After installation, it can be configured globally or for specific users from the Plugins section of WHM. By default, it scans emails, home directories as well as public FTP and Web spaces.
Enable cPHulk
cPHulk is another very useful security tool provided by WHM that protects your server and its services against brute force attacks.
It is enabled by default in the latest WHM versions but you can also activate it manually from the menu at Home > Security Center > cPHulk Brute Force Protection.
The interface allows you to tweak settings such as the maximum number of password failures allowed until an account is blocked. You can also whitelist IPs or remove them if they end in the blacklist by mistake.
Make sure to always keep your software up to date, since new vulnerabilities are constantly being identified and patched. There are many other security measures that you can implement in order to harden your shared server but the ones detailed in this article will protect it against the most common types of attacks.